Showing posts with label planting bulbs. Show all posts

Tuesday, February 21, 2017

Spring is Approaching! - Garden Planning Guide: Maintenance Tips and Questions Answered

Spring Garden Planning Guide
Have the temperatures been rising and are you yearning to go out into the garden? Spring is approaching and it is a time to start planning and prepping the garden for a successful start to the planting season. There are some recommended maintenance tips for getting your garden underway. Here is a list of common gardening tasks to be performed in late winter/early spring. 

Cleaning Out Garden Beds

True or False? Any dead material remaining from last year should be removed from your garden now. True. It is best practice to remove dead material from the garden in fall to prevent possible pests and disease in your garden. If you have left annuals or perhaps perennials for winter interest, now is the time to tend to them, along with any weeds that might have survived the winter. Pull out any dead remaining annuals and prune perennials back to the ground to encourage new growth. If cold temperatures are still to be expected, push mulch up around the crown of the plants to protect them from temperature fluctuations.

Mulching Garden Beds
True or False? New mulching should be applied now before the ground thaws.  False. Mulch acts as an insulator and applying mulch before thawing would actually inhibit warming as temperatures rise. Allow the soil to warm, then apply two to four inches of natural pine mulch. When applying, keep mulch several inches away from tree and shrub trunks to prevent oxygen loss and rotting. Mulch benefits plants by reducing water evaporation, preventing weeds, adding organic matter to the soil and also acts as a buffer, preventing drastic changes in soil temperatures. 


Lawn Care

True or False? Nitrogen based lawn fertilizer can only be applied after April 1st.  True. According to the EPA, the prohibition on application of fertilizer between December 1st and April 1st applies to products that contain nitrogen (N), phosphorus (P), or potassium (K). If a product does not contain any of these nutrients, it could be applied during the winter months without violating this law. ExplanationIf the ground is frozen, there is a greater danger of runoff and possible contamination of groundwater. Fertilizers applied when the ground is thawed and porous are absorbed and utilized by plant material and go through a natural filtration process before reaching the aquifer system. Please note that there are a variety of organic, natural fertilizers on the market that are more environmentally friendly. Success rate depends on brand and application.

Pruning Flowering Trees and Shrubs (Photo: Magnolia Royal Star)

True or False? Spring flowering trees and shrubs should be pruned in late winter/early spring. False. General rule of thumb is to prune flowering plants AFTER they flower. Early spring flowering trees and shrubs including rhododendron, azalea, forthysia, magnolia, plum, Eastern Redbud and cherry form their buds from the season before and should be not be pruned until after flowering. Pruning them now will remove flower buds that have already formed, resulting in a loss of blooms.

Pruning Summer Blooming Shrubs  (Photo: Buddleia Dwarf Butterfly Bush Lo & Behold)

True or False? Summer blooming shrubs such as Spirea and Buddleia should be pruned in spring. True. Mid and late summer flowering shrubs such as Spirea and Buddleia (butterfly bush) prefer a spring pruning to promote fullness and blooms. Prune Spirea slightly for shaping. If the plant is overgrown to the point it is unsightly, it can be pruned more drastically to rejuvenate it now in spring. Buddleia benefits from an early spring pruning and should be pruned all the way back in late winter/early spring to promote fuller plants and better blooms in late summer. This practice is best performed once you see signs of life on your plants.

Pruning Evergreens (Photo: Weeping White Pine)
True or False? The best time to prune evergreens is in early spring. True. Evergreens can be pruned anytime when there is no threat of extreme temperature changes that would cause undue stress; however, the best time is either in early spring before they push out new growth, or afterwards once new candles form. When pruning evergreens that form candles, such as white pine, it is best to cut candles in half to keep the plant more compact.

Pruning Liriope and Ornamental Grasses (Photo: Dwarf Maiden Grass on Left and Variegated Liriope on Right)
True or False?  Liriope and grasses should be cut back and divided now in spring. True. Liriope and ornamental grasses can be cold sensitive. Exposing the crown of the plant could be the reason for snow and cold damage. It is best to leave liriope and grasses alone in fall and to prune them back in early spring to allow for new growth. Spring is also the time to divide and move other perennials that have become overgrown. It is recommended that most perennials be divided every four years for best bloom. Dig up and divide with a sharp clean spade just as new growth appears, replant and add a sprinkle of slow release plant food in with the soil to help root promotion. Water in thoroughly.

Pruning Knock Out Roses (Photo: Double Pink Knock Out Rose)
True or False? Knock Out Roses should be pruned back in early spring. True. Wait until your roses are sprouting new shoots and showing some signs of life. Then, prune off dead wood or overgrown branches back about one third the size of the plant to promote strong growth and blooms. Be careful to watch while pruning so that you achieve a nice rounded shape for your plant. Early spring is also a good time to apply an organic slow release rose fertilizer mixed in with the soil at the base of the plant to ensure a successful start to the growing season. I would also recommend a regular watering schedule from the base of the plant, since roses do not fare well with constant water on their foliage.


Planting Summer Blooming Bulbs (Photo: Snowball Dahlia)
True or False? Summer blooming bulbs should be planted in late springTrue. While spring blooming bulbs such as crocus, hyacinths, tulips  and daffodils are planted in fall, late summer blooming bulbs such as  Dahlia, Canna and Gladiolus are planted in spring. Amend the soil with compost or manure to insure them a good start and plant in a well-drained area to prevent rotting. Generally, bulbs are planted at a depth of three times their diameter, and specific instructions are usually supplied on the packaging. Once planted, water your bulbs thoroughly and be sure they get watered regularly. Applying bone meal will give your bulbs energy during the growing season, but do not mix in too closely to the roots. 

Endless Summer Hydrangea
Will the unpredictable weather we have been having across most of the U.S. and other areas harm my garden?  I have been getting asked this question quite a bit over the past couple of years. Generally, plants are pretty resilient. Buds that are forming on the trees early are sparked by the warmer temperatures in daytime but slowed down by the colder nighttime temperatures, which tends to balance out their progress. If there is severe cold for a prolonged period of time, buds could freeze and get damaged, but the tree produces enough buds to still have a bloom. More sensitive plants like old fashioned hydrangea 'Nikko Blue' that bloom on old wood are more susceptible to cold and time will tell. If there is die back on your plant, prune out the dead wood and apply a dose of a high phosphorus fertilizer. It could help to boost larger blooms from any undamaged buds. Hydrangea varieties that bloom on new wood, such as 'Endless Summer' and 'Pee Gee' should winter alright.

Winter Bronzing of Evergreens
Some of my evergreens are a bronze color. Should I be concerned? Winter bronzing is normal on evergreens near the end of winter while temperatures are cold. Once the temperatures rise and new growth is stimulated, the foliage will turn back to a more vibrant green. Broken or dead branches are different in that they are completely dried out and brown. Those branches should be pruned off the tree in late winter/early springtime to prevent any further damage. Any falling or divided tree leads can be arbor tied to secure them and encourage upright growth. Split branches can also be arbor tied together, and if caught in time the cambium growing layer of the tree can mend. In the photograph above, the center upright Western Arborvitae are displaying bronzing and there are no signs of broken branches. As you can see the trees are healthy.


Have you heard about my new book, Landscape Design Combinations? My first book A Guide to Northeastern Gardening covers recommended plants for zones 3-9 with topics including butterfly gardening, deer resistant plants, shade gardening, perennials, trees and shrubs, evergreens, general maintenance tips and more. 

Landscape Design Combinations is a continuation of the previous publication, with greater emphasis on design, including numerous numbered and labeled photographs of successful landscape plans. Topics include elements of landscape design, designing for the seasons, how to build a natural stone patio or walkway, simple container combinations and garden styles throughout the centuries.

Both A Guide to Northeastern Gardening and Landscape Design Combinations were written to provide you with the tools needed to help you to create a successful garden. If you have read either A Guide to Northeastern Gardening or Landscape Design Combinations and have found the information to be useful, please consider leaving a brief review. Reviews help a book get noticed (especially when new), and I would really appreciate your help! Click on the links below for more information and previews. I hope to inspire you!

Landscape Design Combinations

A Guide to Northeastern Gardening

As Always...Happy Gardening!

Author: Lee@A Guide to Northeastern Gardening, © Copyright 2017. All rights reserved

Friday, October 30, 2015

Fall Gardening: Time to Plant Those Spring Blooming Bulbs! -Planting Guide

Spring Blooming Bulbs
Fall has arrived and it is time to plant your spring-blooming bulbs! Bulbs require a chilling period so plant your bulbs anytime in fall before the soil freezes but early enough so the root systems can grow before extremely cold weather sets in. Generally, in the coldest areas (Zones 1-4) bulbs should be planted in late August into September and in moderate climates (Zones 4 -7) planting can occur anytime after the temperatures start to dip in September through late November. Various bulbs prefer to be planted a little higher or lower (as shown below) for best development. Generally, bulbs should be planted so the bottom rests at a depth that is two-and-a-half times the bulb's diameter. In a well-drained or sandy soil, plant an inch or two deeper to discourage damage from rodents and increase the longevity of your plants.

Credit: Fall Planting Guide

Purple Crocus

Yellow Crocus

For maximum visual impact, plant bulbs in mass using a garden spade instead of a bulb planter (which encourages single planting) and combine many bulbs together in holes approximately the size of a dinner plate. It is recommended to loosen the top eight inches of soil and mix in a two-inch layer of compost with the loosened soil or use a prepared bulb food while planting to supply nutrients to the bulbs. If using a bulb food be sure to mix the granules into the surrounding soil around the bulb. Avoid placing food directly under the roots to prevent burning. For spring-blooming bulbs prepare the soil in fall, six weeks before the first frost or for summer varieties prepare in spring after the last frost. Apply a layer of mulch to protect your bulbs and water thoroughly after planting to encourage root development.
Purple Dutch Hyacinth (Purple Hyacinthus Peter Stuyvesant)

White Dutch Hyacinth (White hyacinth 'Aiolos')

Muscari armeniacum (Grape Hyacinth)


Different types of bulbs can be layered from bottom to top in the same planting hole to  form a succession of blooms in a given location. For example, you can combine the larger Dutch Hyacinths and smaller Grape Hyacinths in the same hole. Place the larger bulbs first with the smaller bulbs scattered an inch or so above.  The two will bloom at the same time but the smaller plants will fill in between the larger ones. The same can be done with daffodils and other plantings.
Daffodils
Miniature Daffodils

Yellow Tulips

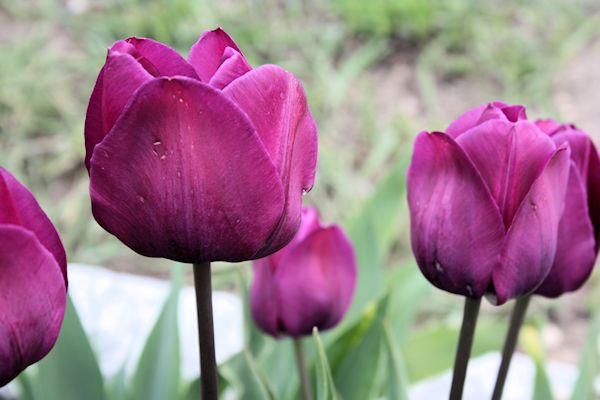
Magenta Tulips
Bulbs can also be planted as companion plants that will complement one another in spring. Try a combination of tulips with an under story of Grape Hyacinths or Allium with a bulb or perennial of choice at the base.  Companion planting will provide a layering effect and provide your garden with additional interest. Consider the growing height of each bulb while planning. Generally, taller growing bulbs should be placed in the rear of the planting bed while shorter growing bulbs (or perennials) are in the front. A favorite combination of mine is a grouping of Allium with an under story of perennial Stella D Oro Daylily. The green foliage from the daylilies masks the dying foliage of the Allium in late spring/early summer while the voluminous blooms of the Allium look from overhead, followed by blooms underneath...an array of interest!
Tulip Collection Brooklyn Botanical Garden
Allium Globemaster and Stella D Oro Daylily Combination

Allium Globemaster
Allium Mont Blanc

Different varieties of Allium can be combined for interest as well...
Mixed Bulbs (Tulips, Hyacinths and Daffodils)
or perhaps a mix of several varieties of bulbs may be the look you are seeking. Here is a combination of tulips, hyacinths and daffodils all planted together in mass for maximum impact.
Spring Flowering Bulbs
  Bulbs can add so much interest to the early spring and summer garden and the possibilities are endless. For some early color in your spring landscape try adding some bulbs to your garden this fall. It's not too late...the time to plant is now!

As Always...Happy Gardening!

Linking to Today's Flowers

  Author: Lee@A Guide To Northeastern Gardening, © Copyright 2015. All rights reserved.


Wednesday, October 8, 2014

October Garden Chores - 10 Helpful Tips

October Garden Chores
Autumn has arrived in the northeast and there are several important chores to get accomplished in the garden before winter arrives and to give your landscape a good start for next spring. Here is a to-do list to help get your started.  These tips apply to USDA zone 7 but can be useful for other gardening zones as well.

(1)  Remove those weeds!  There is nothing more annoying than starting up a new gardening season and being inundated with weeds.  Removing weeds now in the fall will rid their seeds so they won’t be able to multiply over the winter season. Dandelions have long tap roots that can be difficult to remove, but I have found the perfect tool! This garden weeder to the left effortlessly removes the entire root.  It also works well with those nasty clover that have been widespread this season. Being proactive now will save time later.

(2)  Plant Spring Bulbs & Wildflowers: Now is the time to plant those spring flowering bulbs and wildflowers!   Some popular bulbs planted in the month of October are Tulips, Daffodils, Crocus, Allium and Hyacinths. Some northeastern wildflowers include Rudbeckia, Coneflower, Cornflower and Poppies.  For self-sowing perennials, biennials and annuals leave the seed heads on existing plants so they can drop to the ground and re-seed for next spring.

(3)  Tree & Shrub Protection: Remove any diseased or dead branches from trees and shrubs to prevent winter damage.  Also remove water sprouts and sucker growth. 

(4) Insect Control: Now is the time to apply dormant oil onto trees and shrubs for winter protection from insects.  Insects such as scale and aphids lay their eggs in September which overwinter causing early infestations in spring.  Dormant oil is prepared to be safe for beneficial insects, birds, mammals and humans and smothers out harmful insect larvae before they hatch. Certain plants are sensitive to dormant oil so be sure to read all specifications carefully.

(5)  Clean Up Garden Beds: Remove infected leaves from perennials and herbaceous shrubs. Faded peony, roses, hosta, daylily and coneflower leaves are very susceptible to fungal infections and powdery mildew.  Once the foliage has died back for the season cut it completely back to the ground and make sure the ground is clean around the plant.  Cover with a fine layer of mulch after clean-up to protect the roots and dispose of the infected leaves into the trash, not the compost pile.

(6)  Prune Perennials:  Prune certain perennials to a couple of inches above the ground once they are done blooming for the season. Perennials that benefit from winter pruning include salvia, coreopsis, sedum, gaillardia, nepeta and daylily.  Liriope is somewhat sensitive to cold and can be pruned half way but not all the way down.  Some perennials are very cold sensitive such as Heuchera (coral bells), astilbe, liatris, lavender, perovskia (russian sage) and lupine are best to be left until early spring.

(7)  Clean up Leaves: At the end of the month remove leaves from the lawn and garden. Leaves left over winter can harbor fungal disease and damage your lawn or perennials.  Either add your leaves to a compost area or shred them.  A fine layer of shredded leaves can add valuable organic matter to your garden and can be used as mulch protection for your plants.

(8) Dig Up Tender Bulbs: Dig up tender bulbs such as gladiolus, canna lily and dahlias that do not survive the winter at the end of the month (before frost) and store them in a cool dry place such as a crawl space or garage in either a paper bag or in a container of vermiculite.

(9) Mulch Garden Beds:  Check and apply mulch to your gardens around perennials and shrubs in areas where the temperatures fall below freezing for long periods of time. The mulch serves as insulation for the plants and provides some important protection during winter freezes and thaws and also helps to prevent moisture loss.

(10) Continue Watering: Continue to water evergreens, trees and shrubs until freeze warnings (end of October-beginning of November). It is important that prior to winter that there is significant moisture around your plants before the ground freezes in order to ensure their health. Evergreens are especially prone to desiccation and winter burn caused by drying winds and lack of moisture during the cold season.

Have you started your fall garden chores?  I hope you find the above October gardening tips to be helpful.

As Always...Happy Gardening!


Author: Lee@A Guide To Northeastern Gardening, Copyright 2014. All rights reserved


Thursday, October 2, 2014

Fall-planted Flowers for Extra Splendor

Planting Bulbs and Wildflowers
Fall is an excellent time for planning the spring garden. I hope you enjoy this guest post and find the information to be useful! 

The first and most important step to having a beautiful garden full of flowers is their planting. If you do not properly plant the seeds and then perform the required care it is very unlikely that the flowers will grow as beautiful as you want them, if they grow at all. That is why it is very important to follow certain rules when planting your flowers, especially if you are not an expert in this field. Most people underestimate the fall, but it’s the perfect time to plant many wildflowers, long-lived flowers and flowers’ seeds. The following tips are aimed at helping you to plant the flowers you want during the fall so they will delight you with their beautiful blooms and scent next season.

The first step is to define whether your flowers are annual or perennial as the two types of flowers require different types of maintenance. For example annual flowers such as forget-me-not and violets can grow only from seeds while perennial flowers can grow either from planting seeds, bulbs or cuttings from the stable, the roots and even from the leaves of another, already grown flower of the same kind. And flowers that cannot form seeds for some reason can be planted only in a vegetative way.  

Purple Crocus
Planting bulbs
Plant your bulbs early enough (late September-October) or before the first frost. Don’t forget that the winter is coming and your bulbs need time to grow roots before the temperature falls. When planting your bulbs it is better to use a garden spade as the bulbs look their best when planted in groups. Lesser the space-bigger the effect!  Bulbs grow best in a well-drained organic soil and the best depth for planting is two and a half times the bulb’s height. While planting, mix some fertilizer (bone meal or super phosphate) in the soil around and under the bulbs and water. Maintain light watering to keep the soil moist but do not over water. Daffodils, crocus, hyacinths, allium and tulips are good examples of fall-planted bulbs.

Coreopsis
Wildflowers
Autumn is the time when Mother Nature plants, so it’s the best period to sow your seeds. Take your time and choose a sunny spot. You need to ensure that the growing season is over so plant your wildflowers around the same time you would plant bulbs. Any type of soil is suitable for planting (except a completely sterile one) and it helps to plant your wildflower garden near a water resource. Clean the chosen area from roots, grass and other plants. You need to choose the right wildflowers for your garden. Pay attention to the fact that most of them are annuals and “self-sowing”; for example: cornflowers, poppies and cosmos. If you want perennial wildflowers, you will have plants that will come back every year and can last for decades. Daisies, coreopsis and purple coneflowers are good examples of perennial wildflowers.

How to sow your seeds?
The seeds should be spread on bare soil. To achieve a more natural look, you can leave a little grass. The best way to plant wildflowers is to mix the seeds with clean white sand (the type that is used in children's sandboxes) and distribute evenly onto the soil. You should remember not to cover the seeds. You only need to press them into the bare soil, which can be achieved by walking on it or using a roller for larger spaces. Once your seed is “squashed” into the ground, your work is finished. Birds may arrive and start eating the seeds but don’t worry. They won’t ruin your project.

And do not forget – if you are hesitant about about a certain kind of flower you can always visit the local flower shop or simply search online.

Bio: Christine is a professional blogger who is engaged in organizing her household and raising her 2 kids. She has extensive experience in writing about different matters related to home maintenance. Currently she is sharing useful garden care and maintenance tips.